

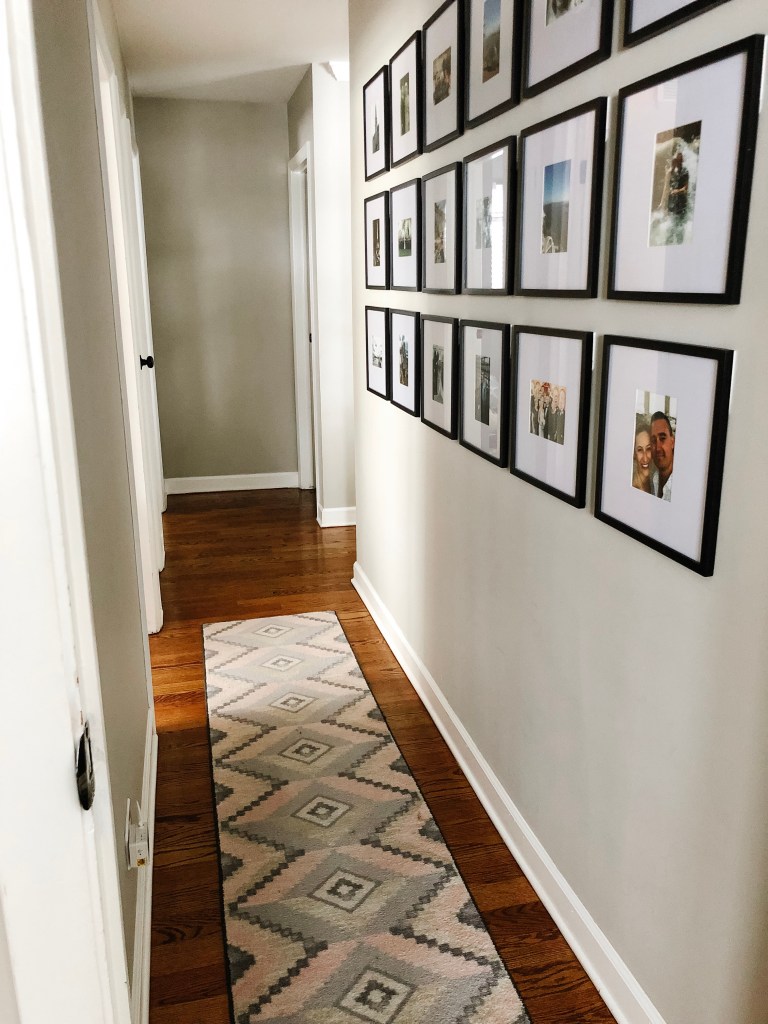
One of my favorite parts about our apartment (also high on my list of favorite things about our house back in the suburbs) is our gallery wall. Because of its location in our apartment, it’s often a conversation starter when we have guests over and it’s often featured in my Instagram photos and stories. Back at our house, it was in the hallway that lead to the master bedroom so it wasn’t seen as often by guests.
The wall started as photos of our travels, but also included photos of both sets of our grandparents, our families and our wedding party. As we continued to add pins on our map of travel, the family and wedding photos came down one by one. Now, with the exception of the picture of our pup, Bailey (which went up after she passed last August), all the photos are from our travels around the country and around the world.
People frequently ask me about how I created the wall, so I wanted to share some details about the frames and how I hung them.
The Frames
It took me forever to find the *right* frames that would bring to life the vision I had in my head. I wanted square, black frames, for a 5 X 7 photo. The reason I wanted them square was so I could frame both portrait and landscape photos without messing up the layout of the wall. I didn’t think it would be difficult to find the frames, but I was expecting the project to be a bit pricey. Turns out, I had it all backwards.
I looked EVERYWHERE for frames. Target, Hobby Lobby, Michael’s, Pottery Barn, Crate and Barrel, Target, Amazon, maybe Ikea, I can’t remember…literally everywhere and couldn’t find what I wanted. I FINALLY found what I was looking for at Walmart and for a really pretty price tag too! These are the exact frames. Sometimes they will be on sale too which is awesome. I think I bought them over a period of time and not all at once, only grabbing 4 or so at a time to spread out the cost. However 18 frames for under $150 is a great deal I’d say.
The Install
Command Strips have been my go-to for a while so I didn’t even consider any other way to hang the frames. I used these Command Strips, specifically for hanging pictures. They can hold up to 16 lbs (which seems so crazy to me). The frames are super lightweight though so I knew they’d be fine. Actually, in 3+ years I think only one has fallen off the wall and tbh I think it was my fault – I’ll explain later. Pro tip: buy the jumbo pack of the these Command Strips from Costco, it’s totally worth it!!!
The Command Strips are super easy to use, and are particularly great in this situation for when I need to change out a photo. I’d compare them to Velcro. When hanging the frames, I had both sides clicked together and attached to the frame, but after installing them, one side sticks to the wall and the other to the frame. Most likely if you’ve ever been over and commented on the wall, I have showed you this by taking one off and putting it back on. They just click together! Totally a game changer for hanging things around the house!
I use two (or four really I guess) strips per frame, one on each side. You can sort of see them from the angle in the photo from our house up above. Anyway, the one that fell I think happened after I swapped out a photo and I just didn’t click it back on strong enough.
I don’t have any photos of the original install but I do have some from the city install about a year ago that I shared in my Instagram story.
And here is my BIG secret about how they are spaced out so perfectly, which people ALWAYS ask…
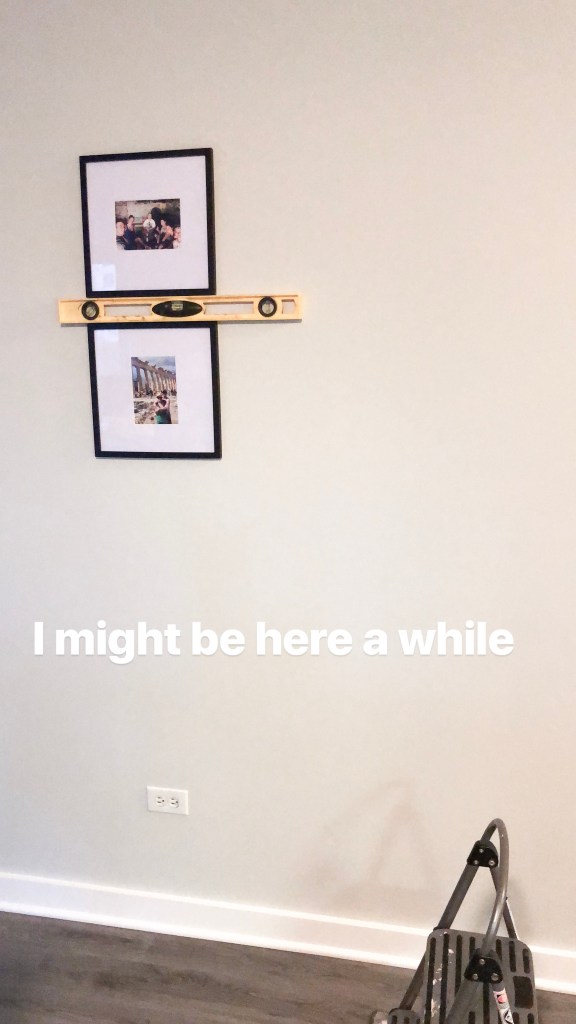


I literally use my level. Bam. Duel purpose: spacer and level!
I measured out the wall and marked the center, started there and worked my way out. It only took a little bit of math and maybe an hour. With the Command Strips already stuck to the frames, all I had to do was hold the level and place the frame on the wall, apply a bit of pressure and that’s all! Of course I also had Bailey, my “helper”. That sweet girl was ALWAYS by my side when I was home. I miss her 😦


So that’s it. An affordable and easy way to fill up a large wall and a great conversation starter, no matter what kind of photos you use!

Kalli, I love the walls you have done! Pictures make a house a home.
LikeLike